How to install Flat Mesh Flyscreen Kits
How to install Flat Mesh Flyscreen Kits
How to install Flat Mesh Flyscreen Kits
Sed pede ullamcorper amet ullamcorper primis, nam pretium suspendisse neque, a phasellus sit pulvinar vel integer.
Getting started
Your Flat Mesh flyscreen has been pre-assembled, so all you need to do is follow these instructions.
You will need to assemble the screen on a flat surface and then lift it into place after.
Below are some videos on how to secure your screen in place.

Inserting the mesh
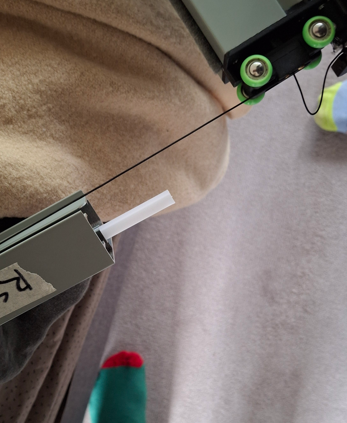
Our flat mesh screens work on the same principal as Ziptack style outdoor blind. At the bottom of the side rail, use a screwdriver to push the "WHITE" track sleeve out of the side rail to make it easier to insert the mesh.
Then push the side rail into place. The bottom is then inserted into the frame. If it is a vertical screen there will be no bottom plate.
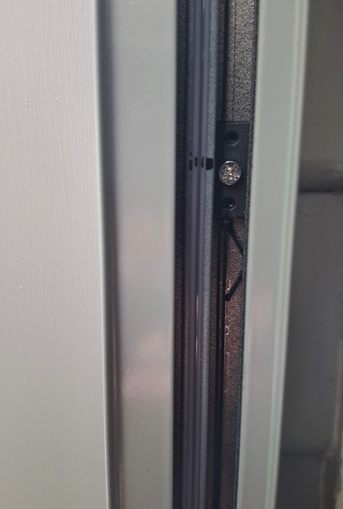
Tensioning your screen.
Tensioning is easy.
As your screen has been pre-assembled, we have put "BLACK" Texta marks where the tension blocks need to line up. Then simply tighten the screw to hold it in place.
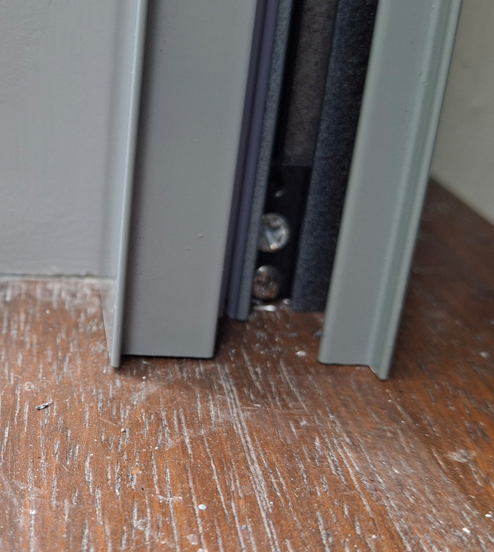
Tensioning Vertical Mesh Flyscreens
Vertical mesh screens are tensioned as per the above image. You can also use the hole to fix the screen into your frame.

Side fixing and top fixing
Whether your screen is a top fix or side fix, you can place screws along the tracks to secure the screen.

Fixing your screen
For the cassette side you can use a strip of double-sided take or a bead of silicone. This is not needed but is an option as the screws tend to be sufficient if placed near the cassette.
If you are still stuck feel free to call us for facetime support.